My garden is tiny. A few raised beds and a wine barrel for herbs, that about sums it up. But you would be amazed how much produce I get out of that little amount of space. Now is the time of year where it seems to all come together for a perfect storm of too much produce, too little time.
That being said, this is also the time of year where I like to play 50's housewife and get all creative in the kitchen by doing some canning.
And by far and away the easiest thing I can is pickles. It takes about 30 minutes to whip up a batch plus a little extra time if you want to water bath them to make them shelf stable.
Now if you go looking for a pickle recipe you are going to find a million...so now I present 1,000,001.
disclaimer: You will find all kinds of information on the internet about acid to water ratios and what is and isn't safe. This recipe is a fairly low acid recipe, but it's the one I got from my mom and she got from her mom. It's the one we've always used and we have never had a problem. If you are nervous about the lower amount of vinegar...go ahead and add more, it certainly won't hurt.
Supplies you will need:
cucumbers
fresh dill
vinegar
pickling salt
garlic and spicy peppers (if you are into that sort of thing...I am)
some crushed red pepper if you like it extra spicy (I do)
canning jars
new, unused lids to fit your jars
rings to fit your jars
Step 1. You'll need to start with clean jars. I've read that you need to rinse them in boiling water, I think this is overkill. A good wash with hot, soapy water followed up by a rinse in hot water is plenty good.
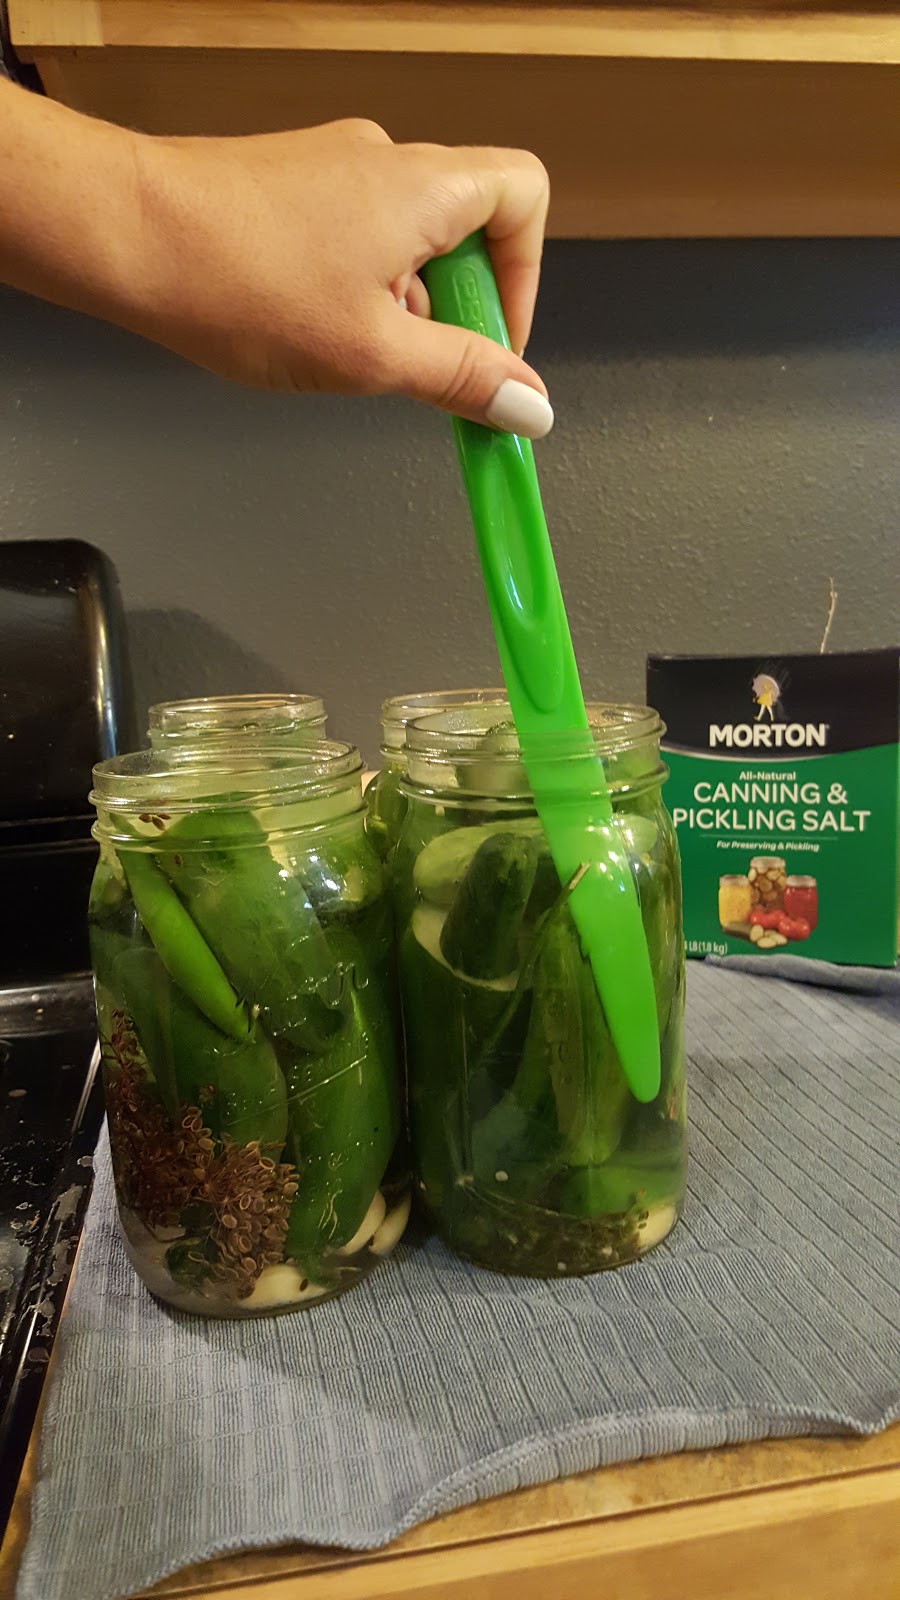
Step 2. pack those jars. I always start with a good head of dill for each jar, followed by a couple of cloves of garlic (love garlic? add more. love good breath? don't add any.), and whatever peppers you are planning on adding (jalapeno, serrano, habanero...they all work). I find it works best to slice those peppers in half before adding to your jar. Finally fill um up with freshly washed cucumbers. You really need to pack those babies in there. Get some muscle behind it and fill all the space that you can. Keep in mind you will need to keep the top 1/2 inch of each jar clear and free of cucumber for your jars to seal properly.
3. Next we will need to make the brine, any this recipe could not be any easier:
9 cups water
3 cups vinegar
1/2 cup pickling salt
Add all three to a big stock pot and bring it to a boil.
4. While the brine is coming to a boil we can move on to the next step: prepping our lids and rings for canning. Place all the lids and rings you plan to use in a small pot, cover with water and bring them to a boil. Once the water starts to boil, you can go ahead and turn the heat off. Just leave them there until you are ready to use them.
5. Once your brine is boiling you can start pouring it into the jars. A large funnel will make this job infinitely easier (they sell canning sets that include some of the basics to make tasks like this easier). As you pour the brine you want to make sure that you are covering all of the cucumbers and still leaving about 1/2 inch of head space at the top of the jar.
6. Use a clean knife or spatula to make sure you don't have any air bubbles in your jars. I just kind of poke around each jar and any bubbles that remain will pop up to the top.
7. After all the jars are full, wipe down the top edge of each jar with a clean, damp rag to make sure none of the brine sits on the edge (it can cause problems with sealing).
8. At this point you will want to either strain the hot water from the small pot of lids and rings or use a magnetic lid lifter to take them one at a time out of the water and place them on the jars. Once the lids are in place, screw on the rings and tighten.
9. Perfecto! Your pickles are now ready for the fridge!! Wait at least two weeks before enjoying.
But wait...what if you want to seal the jars so that they are shelf stable? In that case move on to the next step.
10. If you want your pickles to be shelf stable, prepare a hot water canner like
this one by filling it with water (you will want to make sure that you add enough water that your jars will be covered with the water once you add them to the pot as well). Bring that water to a boil. Add your jars one at a time to the boiling water. Cover the pot and boil for 10 minutes. Remove the jars from the hot water bath. As they cool they will seal. You can check the seals by pushing on the top of the lids. Any that did not seal will move slightly up and down when pushed on...these will need to be kept in the fridge. If the lid is tight and doesn't move up and down when pushed on, it has formed a seal and is now shelf stable.
You did it!! Once you do this a few times, it will become so quick and easy that you will be able to whip up a batch of pickles in no time.
The best part of this recipe is that as long as you have the proportions right, you can adjust it to your needs. More spicy or less. More or less garlicky. Try using green beans instead of cucumbers to make dilly beans, or leave out the dill and use cauliflower instead for some pickled cauliflower. It really is easy and doesn't take much time.
The best part...they are WAY better than store bought pickles!
Enjoy!